Showing posts with label Sewing. Show all posts

Monday, September 29, 2014

Fairy House

This is for my beautiful niece who turned a BIG 5 today. 


Happy Birthday Belladonna.


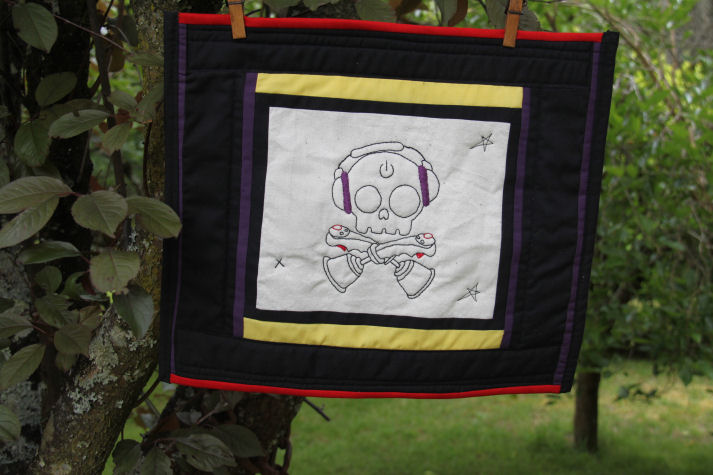
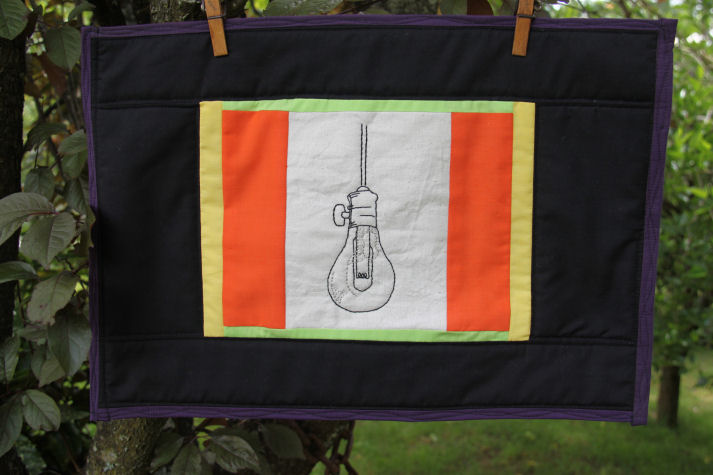
These are so easy to make and only take a couple of sittings to do the stitching. To start off you draw up your picture on the centre piece the add all the fabric strips, i don't really measure anything so they are a little off but thats half the charm. Then add some thin batting to the back and do all your stitching. Now you just have to add the backing fabric and the binding.
If this seems too big a project then start off with something small like a coaster or two, as you can see below it doesn't have to be complicated.


Here is Talons Placemat i made him this year and the Placemats i made a few years ago.


Tuesday, September 23, 2014

Jean Repairs

In line with my Sewing Know How this is post # 4.
Today i am going to show you how to repair the butt in a pair of jeans. Now kids wear out the knees in jeans but men wear out the butt and crutch, i guess its all that scratching.

These jeans were just at the stage where they were not quite holes and this is the time to catch them as it makes it easy to repair.
I don't throw jeans away as they have so many other uses and one of them is repairing holes to give your jeans a longer life span.
The thread colour you use will be determined by the colour of your jeans and ill tell ya sometimes its hard to match. As these were pretty faded i went with a grey thread.
You will also need a denim needle or as large a needle as you have on hand.


Cut up your patches from another pair of jeans, make sure the pieces are not from a well worn part of the jean. Make the patch larger by 1/2 again so the worn part is well covered. Pin in place. 


Using a small straight stitch, go around the patch close to the edge, if you need to go over a thick seem then go slow or hand wind the needle through as this is a place that will break your needle if your not careful. Remove the pins and check the outside to make sure you have covered the whole area with the patch.


Now turn your jeans right side out and you are going to use a small zigzag and go over all of the worn spots.


In the picture below i did one side with blue on the bobbin so you could see it.
I only sewed on the warn parts not all over the patch.


Turned right side out and you can barely see the repair and because of where it is you can't see it at all when worn.


Denim is one of the hardest fabrics to sew as its so thick and you can break a few needles but the results are well worth it especially if you can get another 6 to 12 months wear from your jeans.

Monday, September 15, 2014

Bowl Covers

In line with my Sewing Know How , this is post #3.
From the leftover Table Cloths i made these bowl covers.
You will need leftover fabric i used my table cloths and i also used some leftover duck cloth and some drill from another project. Furnishing fabrics work great as will any medium to heavy weight cotton cloth. Your sewing machine will come in handy as will some matching thread or just use white thread. The last item you will need is some thin elastic.


Friday, September 05, 2014

Old Table Cloths

In line with my Sewing know How , this is post # 2. Today its all about straight lines and re-purposing / recycling.

My cupboard was overflowing with table linen, there were a few that either did not fit our table or were damaged. The solution was to turn them into something new.


In the above washing basket are the ones that are to be made new again.
There was one vintage cloth [below] that had a few holes that were too large to repair so i ripped it up and made 4 food covers, i will use them for cooling bread or pies. I don't recommend ripping up vintage table linen as its hard to come by these days. This one was one of my favourite cloths, but at the same time i still wanted to use it so came up with this idea.

Thursday, August 28, 2014

Sewing Know How

Once learning to sew was taught to children either at home or at school, now its does not seem that people think its a necessary skill to learn. Every thing is cheap to buy and easy to throw away. 
It makes me sad that we have created such a disposable society.


Why should you learn to sew? Well if you can sew then decorating your home or clothing your family becomes something you can be proud of, not to mention all the beautiful gifts you can make.
Rest assured that anything you make will last at least 10 times longer than a cheaply bought item. Sewing can also save you money.

That's my trusty old sewing machine above, she's a Janome My Style 30, a gift from my husband and father in law for Christmas, i think it was 1989. She has only had one service and that was last year, she just keeps going and going.


Friday, July 11, 2014

Place Mat


My handsome little nephew turned 3 today and for his birthday i made him a place mat.
Talon loves cars but not just cars pretty much anything with wheels, my washing trolley gets a work out when ever he visits.  


This is Luigi from cars 2, i found the picture at a colouring in site. It only took 2 days from start to finish, its mostly back stitch with a little satin stitch. 
These Place Mats  i made a couple of years ago, we use them every day and they still look like new. 


Tuesday, February 14, 2012

Shopping bag

anyone who lives in the mountains will tell you we have had a very wet summer, more cloud & rain than sunshine. it has been disastrous for our veggie garden with little or no sun. my tomatoes haven't even flowered yet, broccoli went to seed with no heads forming & everything else is stunted & small.
on the up side i do love rainy weather so i decided to make an all weather bag. about 7 years ago i purchased an end of roll piece of oil cloth & it has been moved from one surface to another just waiting to become a beautiful red spotty bag. so late yesterday afternoon i sat down to make one. well instead of it taking about an hour to make it turned in a few hours when i say a few i mean 4 1/2 hours.


i have to say this is the worst material i have ever worked with, the wrong side slides around every where & the outside sticks. i tried the painters tape on the bottom of my foot but that just rolled off in the first few stitches. but i was not going to give up, i have been wanting this bag for a long time so i persevered  & now i have a lovely red spotty bag that can get wet when it rains. 


i lined it with a plain red fabric & if you look closely you can see how bad my stitching is. i wont be in a hurry to use the rest of the oil cloth. i was thinking about recovering my computer chair with it but i think ill have to think about it for quite a while before attempting another sewing expedition with that fabric.
i pretty much used this shopping bag tutorial, i just made it a bit smaller.

i am linking here
northerncottage

Wednesday, November 23, 2011

Grocery Bag Tutorial

Christine's Bag
this is part of a gift for son #1's girlfriend, a bag to carry her books to uni. 
i saw a bag like this a while a go on a blog,[ i cant remember where]. so i thought id give a tutorial a go. it seemed easy, till you have to do it that is. please be kind :o).


if you want to make a lined bag like mine you will need to cut the body piece & the two side gussets for the inside lining in a contrast fabric. cut all pieces pictured above for the outside of the bag. all measurements are in inches, bigger numbers on my tape measure = good for tired eyes. all seams are double stitched.


Picture#1
my bag has lined paper sewn on it, if you do not wish to do this then skip this step.
5" from top edge of the body of  the bag draw a line across. you can use a water washable pen, I just use a pencil. sew a blue line over the pencil then a second line close to the first.  then using the foot as a guide for spacing continue sewing down the bag front. i went down about 12"
Red Line [see picture #4] sew a red line 3" from the side down the bag to the last line.

Picture #2
for the making of the bag i will be showing the inside lining.
fold the Body of the bag in half top to bottom,[long ways] now pin the Gusset from the top of the bag to the end of the gusset on both sides. making sure right sides are facing each other.
sew down both sides leaving the bottom open.

Picture #3
Sew along the short end, this has now formed the bottom of the bag
repeat for the second gusset on the other side of the bag.
now do steps from pictures #2 & #3 for the outside of the bag.

Picture#4
Red line stitch. this is the bag once it is stitched with gussets in. 


Picture #5
turn bag right side out. if you want to stitch something on the front now is the time.
i wrote on it with a lead pencil & then stitched it with black embroidery thread, also added a felt heart as one of the i' dots. 


Picture #6
now place the lining inside the bag making sure it is still inside out.
pin & stitch around the top.

Picture #7
Picture #8
to make the handles fold in half length ways & iron. sew down the long open edge.

Picture #9
now turn handle pieces right side out. this can sometimes be a bit difficult, this is the method i use.
2 nappy pins & a piece of scrap cloth. pins in either end of cloth.

Picture #10
pin one end to the opening of your handle.

Picture #11
now thread the other end half way through the tube & then start to work the pined end in after it.

Picture #12
now just pull all the way through, do the other one & then iron them both.


Picture #13
turn the bag inside out, fold down the top about 3/4" & iron.

Picture #14
fold over again about 1 1/2" iron & pin.

Picture #15
insert handles under fold, 4" from side seam.

Picture #16
fold the handle forward & pin. do the same for the other 3 ends. after you have pined one handle & one end of the second handle line them up & measure to make sure they are the same length then pin. now try the bag on to make sure the handles are the right length.

Picture #17
sew along the top edge first.

Picture #18
now sew along the bottom edge.

Picture #19
for the handles i always like to reinforce with a box cross.


now its already to go off to school.
you can make these bags any size you like, they are super easy & quick to make up.
if you have any questions please let me know.

Thursday, November 17, 2011

Place Mats


new place mats for the table, machine quilted & hand stitched pictures


this one is A's


son #2


son #1


this is mine


A's breakfast mat

my breakfast mat


the last 2 are spares


they all came together pretty quick, i have a couple more still in progress. think they would make real nice christmas gifts. i have a few sets of coasters for sale that i will put up in a couple of days.

Tuesday, November 15, 2011

Bath mats


6 new bath mats from 2 towels.
fold your bath towel in thirds & cut, then just lay out your chosen off cuts & sew together. place the font side down & machine stitch around the outside leave an opening to turn right side out. stitch around the outside & along both sides of the seams if you like & your done.

 these two towels i purchased about 20 years ago they are very good quality towels made in Australia. we could still have used them as bath towels as they are still nice & thick, however as they are just a regular size towel they are a little small for my boys now [perfect for when they were children]. we now use bath sheets. [imagine how many mats i could make out of one of those].


some of you may remember the blue, green & white fabric from this post, it is the left over fabric from the curtains i made using a sheet from the op shop.


these ones the brown check fabric came from a friends throw out {thanks Carolyn} & the surfboard fabric is left over from some PJ shorts i made for summer.

Friday, October 14, 2011

Sheets to dust cloths

when your old flannel sheets become thin cut them up into dust/cleaning rags
i let the fabric dictate the size of each cloth & then fold in half & stitch around the edge.
they are soft enough to polish & strong enough scrub with.
they last quite a long time esp the ones that are cut from the edge of the sheet as its usually still like new.
they can also be used to make wee wipes.

Thursday, October 13, 2011

sew some fun

cup mats, mug rugs but i prefer coaster.
i saw one of these on flickr & wanted to make my own


a home for my tea cup