Showing posts with label Food. Show all posts

Sunday, August 24, 2014

Lemon Pudding

Still using lemons in this cloud like, melt in your mouth sweet but also sour lemon pudding. There are lots of pudding recipes out there and i have tried a few. This one is very easy, you can cook it in a large dish or in individual ramekins.


Thursday, August 21, 2014

Rice Pudding

On a cold winters evening a warm bowl of Rice Pudding is very welcome.
I make mine in the slow cooker, its supper easy, pretty much add and forget. The smell of vanilla drifting through the house as the pudding bubbles away in the crock pot makes my mouth water.


Rice Pudding can be eaten warm or cold with or without fruit on top, its very filling so a little goes a long way. However saying that i always make a double lot so there are leftovers for the next day.


Rice Pudding

4 cups Milk
1/2 cup short grain Rice
1/4 cup Sugar
1 tsp Vanilla or 1/2 tsp of Vanilla Paste

Add all to your crock pot and cook on low for 4 or 5 hours and then on high for 1 hour. stirring a few times during cooking. 
You want the rice to be cooked and most of the milk absorbed, cooking times will depend on how big your crock is and if you doubled the recipe.

 If you cook for too long and its very thick and gluggy, turn off the crock and add a little milk and stir until its the consistency you like.
If you reheat it the next day add a little more milk, unless you like it really thick.


This one had a few frozen raspberries on top but you could use any fruit you like or even a bit of jam.
I was thinking of adding sultanas to the crock the next time i make it, i think it would make a good addition.

For the milk you can use fresh, long life, powdered or even almond milk, i pretty much always use long life milk and as i double the recipe its a full 2 litre carton. However when i double the recipe i don't double the sugar.

Anyone else like Rice Pudding, do you make it on the cook top or do you also make it in the slow cooker. 
If you have a different recipe id love to give it a try.

Edited Sunday :
I made it on Thursday and added 1/2 cup sultanas and cut out the sugar. It was very nice, i will make with sultanas again. You could also use raisins or currents as well.

Linked here
 R and R Wednesday # 66
Fabulously Frugal Thursday # 81
Homemaking Party
Tasty Tuesday
Backyard Farming Connection # 94/ 95
Wonderful Wednesday # 87
Tuesdays with a Twist # 72
Maple Hill Hop # 44
 What you Wish Wednesday # 14
Homestead Barn Hop # 172
Homemaking Link Up
Motivation Monday # 109

Monday, August 18, 2014

Lemon Meringue Pie


This is my all time favourite lemon recipe. It was also the first lemon recipe i ever made and that's going back over 25 years. 
The difference between my pie recipe and others is i use a biscuit base instead of a short crust pastry base.
I use Arnotts Marie biscuits and crush them up in my big bench top blender, i usually do two or three packets at a time to fill my jar.


Lemon Meringue Pie

Base
Biscuit Crumbs [enough to line your chosen dish or plate]
Butter melted

Filling
Condensed Milk [can or homemade]
3 Egg Yolks
1/2 cup Lemon Juice
1/2 tsp Vanilla

Meringue Top
3 Egg Whites
1/2 tsp Cream of Tartar
1/8 tsp Salt
2/3 cup Sugar
1 tsp dry Lemon Zest [or zest of 1 lemon]


Base:
Combine the butter with the biscuit crumbs, the amount of butter will depend on the amount of crumbs. Start with a little and add more if you need it. The base should be moist so it can be pressed onto the dish at the bottom and sides. Place in the fridge while you make the filling.

Filling:
Using a wooden spoon mix the milk and juice, add the egg yolks and mix until combined.
Pour into the base and put back in the fridge.

Meringue Top:
Beat whites, salt and cream of tartar until soft peeks . Beat in vanilla and sugar a little at a time until stiff peeks form.
Gently place spoonfuls on top of filling until pie is covered. No need to smooth as its best to leave it rough.
Sprinkle lemon zest on top.
Cook 160 Celsius or 320 Fahrenheit  for 15 minutes or until lightly browned.


I like to make this the day before i need it, as it tastes better the second day. Afternoon tea or a dessert with coffee or a cup of tea, share it or don't its up to you :o)
How do you make your pie ? Do you use a short crust pastry, a puff pastry or a biscuit base.
If you have not made this before and love lemon or lime then please give it a try and let me know how it turned out.

Linked here Happiness is Homemade # 33
and here Simple Saturdays # 36
and here From the Farm Hop
and here Say G'day Saturday # 100
and here Homestead Barn Hop # 172

Thursday, August 14, 2014

Roast Pumpkin Soup

We have had a couple of cold days so i thought i would make some pumpkin soup. 
This is not my usual pumpkin soup recipe. I dried all my garlic a couple of months ago therefore i didn't have any fresh to roast so thought id try a different recipe, and i have to say i like it a whole lot better than my old Pumpkin Soup recipe.


Pumpkin Soup

Freezes Great
I like to use Jap or butternut pumpkin, you can use a 2kg to 3kg pumpkin anything bigger you will need to double your spice mix.

2kg Pumpkin
2 large Potatoes
2 Carrots
1 Onion

Peel and roast all of the above leave the onion whole and chop up the other veg, drizzle a little olive oil. Cut your potatoes smaller as they take the longest to cook. Roast about 40 mins to an hour 180 Celsius or 360 Fahrenheit. I do mine a little longer because i like it when the pumpkin starts to get black bits around the edges = more flavour.

1/2 tsp Cumin
1/2 tsp Nutmeg
1 tsp Ginger
Salt and Pepper
4 to 6 cups Vegetable Stock
Greek Yoghurt

To a bench top blender add vegetables and stock a little at a time until well blended and smooth.
Pour into a large stock pot and add the spices. Depending on how thick you like your soup you can add more stock or water. I like a thicker soup so it sticks to your bread.
Cook on low for about 15 to 20 minutes.
Serve with a dollop of greek yoghurt or sour cream.
Of course you will also be wanting some Crusty Bread to accompany your delicious soup.

Freezes great, if you use those reseal bags they can be frozen flat and it is heaps quicker to defrost and saves on freezer space.
When reheating from frozen you may want to add a little water.
You can bake the vegetables up to 3 days before you make the soup.
A roast dinner on Sunday add in your extra vegetables and soup on Monday or Tuesday, too easy.

Tuesday, August 12, 2014

Tribest Personal Blender

For christmas last year Mr GoingGreen gave me a Tribest Personal Blender. I researched personal blenders and this one was the best in function, workmanship, attachments, spare parts and price. 
Everything you can see in the below picture can be replace separately. All plastic parts are BPA free. 
It also comes with a manual and 40 recipes.
THIS IS NOT A PAID REVIEW 


This set was $165.


The large cup holds 425ml and the small cup holds 250ml, there is also an extra large cup at 550ml {not in this set}.


The base unit is 17cm high, weighs just under a 1kg with a 200 watt motor. It is not quite as loud as a normal large bench blender. The little rubber feet can also be replaced if you happen to loose one.


These are the two blade options, the two wing blade is for grinding nuts, small dried items like ginger, peel, garlic and also herbs. The four wing blade is for shakes, smoothies, fruits and vegetables. It can also crush ice. The rubber O ring can also be replaced.


The three mason jars come in 300ml, 175ml and 75ml. They each come with a lid and band and 1 plastic fridge lid.


The mason drinking jar comes with a lid and a commuter lid. Also pictured is the mason jar attachment so you can put the jars or the drinking jar on the base. It also fits on IXL jam jars so they can also be used on the base.


This is the base with the 250ml cup attached.


This is the 75ml mason jelly jar with the jar attachment. Below is the mason drinking jar with the attachment.
Being able to mix/blend right in the jar or glass you require makes it so easy and less to wash up.


In addition to all of the above i also received more lids, jars and drinking jars.
I use my Tribest pretty much everyday. Unlike a bench blender where i have to rinse the jug when i need to blend something else, with this little beauty i can just change cup/jars. Wash up is just as easy, give everything a rinse and your good to go.
Wether i am grinding up nuts, herbs and spices or im making smoothies, salad dressing or health drinks this little blender can not be beaten.  

If you want to add a health drink to your morning breakfast then this is the way to go, the convenient size means you can take it to work, fill your cup with everything before you go or even the night before and place in the fridge at work, then blend away at lunch time. It would also be excellent if your going travelling in a car, camper van or even on a cruise just think of the possibilities.   

Here is the link for the company Tribest and this is where i purchased my Tribest here in Australia.
THIS IS NOT A PAID REVIEW

Linked here Homemade Monday #93
and here Simple Saturdays #35
and here From the Farm
and here Homestead Barn Hop #171
and here Homemaking Monday #13

Saturday, August 09, 2014

Natural Pectin

Part 1

I dont buy commercial pectin that is used in jams and jellies. Instead i use lemon seeds.
All citrus seeds are rich in pectin and will thicken any flavour of fruit preserves.
As you may have noticed i use a lot of lemons, they have so much to offer. Juice, peel, pith, flesh and seeds, they can be used in a large variety of sweet and savoury foods.


The seeds can be stored in the freezer for when you need to thicken up your curd, butters or jams. Store them in a small container and just grab as many as needed.

To use the seeds i put them in a small bag that i made out of a piece if net curtain with a draw string and place in your pot or bowl of simmering fruit.


You can also put them into a small piece of cheese cloth and tie with string. I dont like cheesecloth i think it is over rated and way too expensive. A cheep net curtain from a second hand store is a much better option.
When the fruit is done squeeze the bag over the pot, then you can empty and wash for the next use.

If you really want to see pectin at work put several in a small dish with a little water and leave over night, the next day the seeds will have a gel around them. You can use them like this, just drain off the extra water and place in a bag or cloth.

You can also make it from apples and other fruits. The white pith on any under ripe citrus fruit like yellow grapefruit it very high in pectin.
I have not tried making pectin with the pith or any other fruits so when i do ill right up the recipe to share.

Linked here Fabulously Frugal Thursday # 79
and here Say G'day Saturday #99
and here Homemaking party
and here R&R Wednesday # 64
and here From the Farm Blog Hop
and here Old Fashioned Friday # 80
and here Farmgirl Friday # 167
and here Fabulous Finds #18


Wednesday, August 06, 2014

Lemon Melting Moments

These are soft melt in your mouth cookies and very hard to stop at just one. Nice with a hot cup of tea or a cold glass of milk.


 Lemon Melting Moments

225g Butter
50g Icing Sugar
1/2 tsp Vanilla
3 tsp dry Lemon Peel or zest of 4 lemons
225g Plain Flour
3 Tbl Cornflour  [Cornstarch]

Beat butter, sugar, vanilla, and peel until light and fluffy. Sift the flour and cornflour into the butter mix.
Roll into small balls and lightly press with a fork.
You can also pipe these onto the tray, but i find it a pain and too much clean up after.

Cook 175 Celsius or 350 Fahrenheit for about 12 mins, these do not need to be brown.
Let them firm up a bit before placing on a wire rack to cool.


Icing
125g Icing Sugar
1 1/2 tsp dry Lemon Peel or zest of 2 lemons
Lemon Juice

Mix in enough juice to make a soft spreadable icing but not too runny, just add more icing sugar if its too soft. Spread over cold cookies or you can sandwich them with icing in the centre.


I hope your not all sick of lemon recipes yet as i have a few more to come. 
Why so many, you might ask well i do love anything lemon but as there is so much juice, peel and seeds when you process the lemons then you also need recipes to use them up.

If you make these you will not be disappointed, the flavour is delicate yet tart. 


Thursday, July 31, 2014

Lemon Curd


Sunshine in a jar, not too sour and not too sweet. We will be using up some of the lemon juice and freshly dried lemon peel. 


Lemon Curd on a hot fluffy pancake.


All the naked lemons from yesterdays Sunny Lemons post are squeezed. 
Using an old glass juicer makes the job very pleasant and brings to mind memories of when i was a child helping my Nanna in the kitchen. 
Not only do i want juice for this recipe i will also need zest and some of the seeds from the lemons. 
Mmmm seeds your wondering what could they be for, well i dont use commercial pectin to thicken my curd i use the lemon seeds as it already has pectin in the seed. 


Lemon Curd

3 Eggs
1/2 cup Sugar
3/4 cup Lemon Juice
1 teas Lemon Zest dry  [if fresh, zest of one lemon]
150g unsalted Butter

Simmer about 1 inch of water in a small pot. Whisk eggs and sugar in a heat proof bowl and place over your pot. Make sure the bottom of the bowl does not touch the water. I use a small 1L Pyrex bowl.
Stir in the juice, zest and butter. Add about 10 or so seeds to a small bag or piece of cheese cloth and add to your bowl, see picture above.
Make sure your heat is low or it will cook the egg whites. Occasionally stir and cook until it thickens or coats the back of your spoon. It may take a little while but it is well worth it.


While your curd is cooking, boil your jars in a big pot of water for about 10 mins. Turn off the pot and leave them there until your ready to use them. You can put a tea towel in the bottom of the pot so the glass is cushioned if you dont have a jar rack.


When your curd is thickened remove the jars from the pot and drain off any water.
Ladle the curd into your hot jars, i let mine cool before adding the plastic fridge lids.
It will keep for about 3 weeks in the fridge or you can also freeze them.
This makes a really nice lemon tart filling.


This recipe is pretty similar to the Passionfruit Curd i make.
If you give either of them a go let me know how it turns out.


Linked here R&R Wednesday #63
and here Homemaking Party
and here Homemade Monday #91
and here From the Farm Blog Hop
and here Homestead Barn Hop #169
and here Maple Hill Hop #41


Monday, July 21, 2014

Best Bread Ever

This is hands down the best bread i have ever made and the easiest. No kneading involved.


8 hour bread [or over night]

3 cups Bread flour
1/2 tsp Yeast
1 3/4 tsp Salt
1 1/2 cups Water
1 Cast Iron Pot

I make this dough the night before or first thing in the morning if i forget, it needs a long rise time.

Mix everything in a large bowl to form a shaggy dough using a wooden spoon. Only mix till just combined.
Leave in bowl and cover with a tea towel or plastic wrap. If using a tea towel the dough will get dry bits on top, that does not matter as it will not effect the bread.
You must use a cast iron pot for this bread as anything else will not produce such a fine loaf.

The next day or that afternoon depending on when you started the dough, pre heat your oven to 200 degrees Celsius, place your pot with the lid on in the oven, on the middle shelf. set your timer for 30 mins.
Put a little flour onto your bench and scoop out the dough with your hand. Fold it under its self to form a smooth ball and leave on the bench.
When the timer goes off place your dough in the pot and put the lid back on. No need for oil or flour on the bottom of your pot. Set the timer for 30 mins again, make a cuppa and read a magazine or in my case a little crocheting.
When the timer goes off remove the lid and set the timer for another 15 mins.


This is what you end up with, a light airy middle with a crusty out side.
MMMM warm bread with lashings of butter.

Added Friday- Yesterday i made my bread and when the last timer went off i heard it but it didnt register in my brain as i was working on something else and as a result it was in the oven another 15 or 20 mins. Well it was very crusty and brown, Mr GoingGreen was using a sawing technique to cut it up and i think the chain saw was mentioned but after all that it was still a wonderful loaf of bread. Mr GoingGreen and son #2 really enjoyed the crust.
So i have to say this is still hands down the best bread i have ever made.

Linked here
Homestead Hop # 8
 Homestead Barn Hop #168
 Farmgirl Friday Blog Hop # 166
 Simple Saturdays Blog Hop # 32
 Homemade Mondays weeks 90
 Homemaking Wednesdays

Tuesday, July 15, 2014

Sunny Poached Eggs


Poached eggs on home made lightly toasted bread with a cup of green tea, that was my breakfast today on this grey morning with the eggs being the only sunny thing. It feels like winter today for the first time, usually my back room is bathed in sunshine but not today. Its a waiting for rain day and that's good because we have not had a good soaking rain in quite a while, so if the 60% chance of rain that they forecast is correct then we should have a good show, well fingers crossed.


Poached Eggs [eggs in a bag]

eggs
salt
vinegar

In a small pot half fill with water and simmer on low heat add a good pinch of salt and about 2 Tbl vinegar.
When its a low simmer [do not boil] crack 1 egg into a small bowl or ramekin, swirl the water in a circle and slide the egg in, keep the swirl going and do the same for the second egg.
Keep them spinning in the pot for about 3 mins.
I never measure or time the cooking of the eggs, after you have made them a few times you will know when they are done.


Why i call them eggs in a bag, well because the sunny yellow yolk is in a bag of white.
If you have not made these before or not for a long time then give them a whirl, you wont be disappointed.
Try to use as fresh an egg as possible as the older they are the more the white separates in the pot. Those two eggs came from my girls this morning.

Linked up at Homestead Barn Hop #167


Saturday, July 12, 2014

Passionfruit Curd


Its like sunshine on a cold winters day, slather it on warm pancakes and while away the morning with a good book or the spring seed catalogue.


Ingredients:

3 Eggs
3/4 cup Sugar
3/4 cup Passionfruit pulp
125g unsalted Butter

Whisk the eggs, sugar and passionfruit in a heatproof bowl over a pot of simmering water [dont let the water touch the bottom of the bowl]
Add the butter and stir, cook until it thickens.

Make sure its a low simmer or you will cook the egg whites [still tastes good but you will have bits of cooked egg white in your curd].
It will take quite a while to thicken, just dont rush it.
Make sure you use unsalted butter or it will have a grainy texture.

Sterilise your jars in a pot of boiling water for 10 mins, i put a tea towel on the bottom of my sterilising pot so my jars are cushioned.

Ladle in the curd while the jars are still hot, let cool and add the lids. I use the plastic screw lids and put them in the fridge.
Keep for about 3 weeks, ours only lasts about a week and a half.

Spread on hot pancakes, toast, fresh bread, scones, use as a filling in a jam roll or any other cake, on ice cream or use it in a trifle. I am sure there are many other yummy dishes you could use it with. Let me know if you have some i haven't listed.


Home Acre Hop #79

Wednesday, July 09, 2014

Tim Tam Cake

Its my husbands Birthday today so i have made him a Tim Tam cake. I saw a picture of one on pinterest so i thought id give it a go.


I used a chocolate fudge cake recipe

250g dark chocolate
125g butter
2/3cup sugar
2/3cup SR Flour
4 eggs

Preheat oven 180 c. butter and line a rectangle baking tray.
Stir chocolate & butter over a pot of simmering water till melted, let cool.
Combine chocolate mix with the remaining ingredients in a medium bowl, beat on low with an electric mixer.
Pour into pan, bake 30 mins. stand 5 mins then turn out onto wire rack to cool.

When cold cut in half and trim up sides making sure they are the same size.

Cake Filling

100g butter softened
150g chocolate [melted and cooled]
3cups icing sugar
1Tbs milk

Beat butter until light and fluffy add sugar and mix until smooth. Add chocolate and enough milk to make a smooth spreadable consistency.
Spread over one cake then place the second cake on top.

Ganache Icing 

100ml pouring cream [i use long life cream]
300g chocolate

Melt chocolate over a pot of low simmering water then add the cream, use a whisk to mix and let thicken slightly. Place on bench to cool for 10 mins then in the fridge for 15 mins siring every 5 mins. You want it to be thick and spreadable but not hard.
Spread over cake and put in fridge to set.
I used a glass to cut out the bite piece.


Sunday, March 25, 2012

Onion

Spring Onions, Green Onions or Shallots
what ever you call them they are delicious & super easy to grow

i purchased these organic onions in a bunch, cut off the green tops to use & then planted the white part with the roots into the garden. pictured above is three weeks ago after i cut the tops off them, if you click on the picture you can see where i cut them. they have been in the garden for about 12 months. i just cut some when i need them & they regrow.

before the last cutting they had been left to grow & had become leggy, thick & dark green.
i washed & sliced them & filled up 2 drying trays.


i have an ezi dry dehydrator that i got for christmas a couple of years ago & i love it.
i never time how long it takes to dry stuff i just keep checking it till its done.


out of those two trays i got a large vegemite jar full [pretty well packed in].
you can use them in soups, casseroles, stews anything you need onions for really.
i have since used some in a dry mushroom soup base, that i will post about next time.

Sunday, January 15, 2012

Tree to Table


theses green beauties came from one of our plum trees down in the chook yard. thought we would give ripening them inside a go as the birds are very greedy & don't like to leave us any.


wiped them all with a damp Flannel cloth & then placed them into paper bags to ripen. about 3 weeks later they were nice & ripe, ready to eat. after 2 weeks check them every day until they are ready.


Plum Upside Down Cake


50g Butter
1/3 cup Brown Sugar
125g Butter
1 cup Sugar
1 tsp Vanilla
2 Eggs
1/2 cup Almond meal
1 1/2 cups SR Flour
Plums [i used about 13 or 14 it will depend on the size of your pan]

Grease your pan & line with paper on the bottom [no need to do the sides]
Melt the 50g of Butter & pour over the lined bottom
Sprinkle the Brown Sugar over the melted butter set aside

Beat 125g Butter, Sugar & Vanilla until pale & creamy [or not so pale if you have fresh free range eggs]
Add Eggs & beat well
Fold in the Flour & Almond meal

Halve your plums & remove the seed, place skin side down on top of the brown sugar until the bottom is covered
Spoon mixture over the Plums & smooth with the back of your spoon
Bake 40 to 45 mins
Stand cake in tin for 10 mins before turning out
The paper should be left in the bottom of the pan when the cake comes out
Serve hot or cold with Cream or Ice Cream or on its own with a dusting of Icing Sugar


Green Shake Combos all with spinach

Banana & Strawberry
Banana & Rockmelon
Banana & Pineapple
Raspberry & Strawberry
Banana &; Blueberry
Orange & Pineapple


Tiramisu 


1cup Sugar
4 Egg Yolks
1 1/2 tsp Vanilla
1pk Cream Cheese
1 3/4 cups Cream
1 Tbl Coffee
1 1/4 cups hot water
1 pk Lady Finger Biscuits
1 cup Dark Chocolate chopped

Beat Sugar, Egg Yolks & Vanilla for about 1 min.
Add Cheese & mix until smooth.
Place in the fridge for about 1 hour

Whip your cream & then fold into your Cream Cheese
Place back into the fridge for 1 hour
Add Coffee to the Hot Water & leave to cool in a bowl

Dip Lady Fingers into the coffee one at a time [don't leave in the coffee or they will fall apart]
Place a row of fingers in the bottom of your chosen dish
Sprinkle Chocolate over the fingers then spoon a layer of Cheese mix over that
Continue until your are left with the Cheese mix at the top of the bowl add the last of the Chocolate
Place back into the fridge until needed
Best made one or two days before served

i usually make this in a glass trifle bowl but we were taking it to a BBQ so i made it in a glass dish with a lid, much easier for travelling.

This time with the left over Egg Whites i made single serve mini Pavlova's

Saturday, January 07, 2012

Pie & Custard

a handful of this


plus a few of these


makes this


Rhubarb from the garden & few green apples from the tree makes a wonderful Apple & Rhubarb Pie with some home made Custard.
i stewed the Apples & Rhubarb separate, then mixed them together & poured it into the pie crust.

Home-made Custard


  • 1 cup milk
  • 1 cup thickened cream
  • 1 vanilla bean or 1tsp Vanilla 
  • 4 egg yolks
  • 1 tablespoon cornflour
  • 1/3 cup caster sugar

  • Combine milk and cream in a small pot & add vanilla [if using vanilla bean split bean lengthways & scrape seeds into milk & drop in the bean] 

  • Cook slowly on medium heat until hot but not boiling.

  • Whisk egg yolks, cornflour and sugar in a glass bowl.

  • Remove vanilla beans from milk mixture. 

  • Pour hot milk mixture over egg yolk mixture & whisk 

  • Pour into a medium pot & cook on low, stirring constantly for about 10 mins or until thick & will coat the back of a spoon. 
  • Do not allow custard to boil, as it might curdle.

i hate it when you have a recipe that calls for either just the whites or just the yolks. when this happens i always have a companion recipe to use the left over egg. in this case it is Meringue/ Pavlova. i will post that recipe tomorrow. 

Friday, December 09, 2011

Potato Casserole & Honey Mustard Sausages

Because im home, i have heaps of time on my hands so i have been trying out new recipes that i have found on Pinterest. This is the potato casserole i made last night with a couple of changes from the original recipe.


original recipe comes from  MakeLifeDelicious Below is my version

Potato Casserole

1 1/2 kg Potatoes
2 cans Cream of Mushroom Soup
300ml Sour Cream
1 1/2 cups grated Cheese
Salt & Pepper
sprinkling of Bread Crumbs
few knobs of Butter


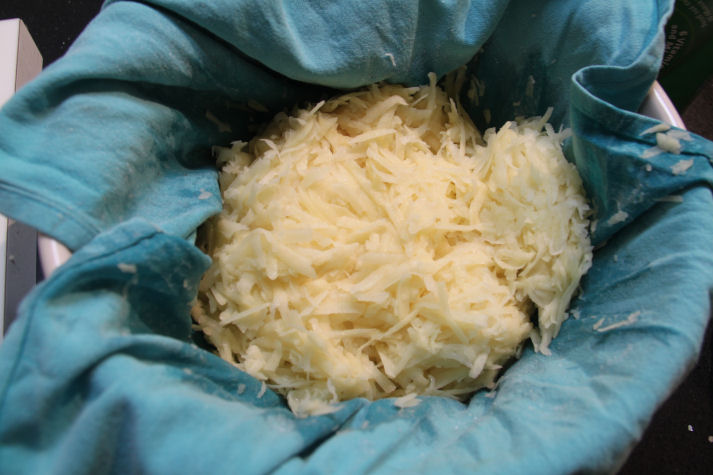
place a clean tea towel inside a large mixing bowl or bucket


peal your potatoes


grate your potatoes into your tea towel, then bring up the corners of your tea towel, twist & then squeeze your potato ball to remove excess water. empty your bowl with the potato juice & wipe out.


place into your bowl : Potato, Soup, Cream, Cheese, Salt & Pepper, mix together.
grease your baking tin ~ casserole dish i have found butter works better than oil.


tip in your mix, add a few knobs of better & sprinkle with bread crumbs.
180 degrees on the middle shelf for about 1 hour or until brown & bubbly.
this makes a fair bit but its even better reheated the next day.
you can add extra chopped mushrooms
i dont always have sour cream so i just use a carton of long life cream from my pantry


Honey Mustard Sausages

this recipe calls for those little cocktail sausages but i just use regular thin sausages the other ones are too expensive. this recipe has no quantities

Sausages
Honey
Wholegrain Mustard

cook your sausages either in a fry pan or i usually cook them in a baking tray in the oven. remove the sausages & drain, cut each sausage into three pieces.
in a small pot add about 2 1/2 Tbl Honey & 2 Tbl Mustard [the amount will depend on how many sausages you use] heat until runny.
there are two ways to do this, you can either put the sausages back into the pan [after you have drained the fat & wiped out the pan] & then pour over the honey mix & place it back into the oven for five minutes or you can put the sausages into a serving bowl & honey mix into a dipping bowl {second option is good for party finger food]

both recipes are very yummy, especially the next day :o)

i still have some stuff over on my Flickr account for sale if you want to have a look :o)