Showing posts with label Recipes. Show all posts

Thursday, December 11, 2014

Banana Pudding

We had friends and family over last weekend and Banana Pudding was one of the desserts I made.
This is my go to easiest dessert recipe. 
Its a no rule recipe you can change it up to suit yourself or to what ever you have on hand.
We pretty much always have bananas in our house so that's why its called Banana Pudding and not Fruit Pudding.


Bananas are the first ingredient and the second would have to be some sort of cake or biscuit.
The cup cakes below were ones I made using those pretty patty pans for the first time, some over flow occurred as I filled them a little too full. These weren't used at the time as they are ugly and someone broke off bits to eat, i'm not naming names but it could have been me.
Any way all the experiments went into the freezer for just this recipe.


Ingredients :

Bananas - sliced
Cake - sliced
Custard
Cream - whipped
Chocolate - grated or shaved

To make this delicious dessert you layer cake, custard, chocolate and then bananas nearly all the way to the top of your bowl. Depending on the size of your bowl and how many people you have to feed that's how many layers you will use. For mine it was two of each. End with bananas and then I like to mix a little cream with the custard and spread that on top and finish with chocolate shavings. 


Cake, Custard, Banana
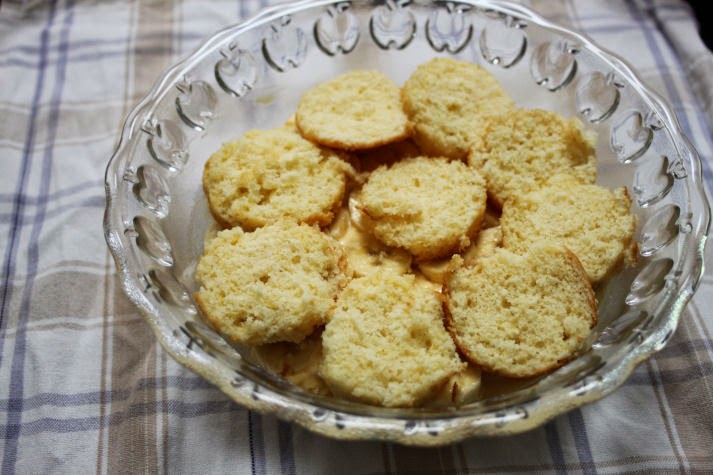


As this is a quick recipe you can use custard powder to make your custard the day before or you can use pre made custard or you could go all out and make Homemade Custard , for this one I used custard powder and made it the night before.


You are not limited to bananas, I have also made this with stewed apples, and cinnamon instead of chocolate. 
You can also use lady finger biscuits instead of cake or any other sweet biscuit.

Linked here


Monday, September 01, 2014

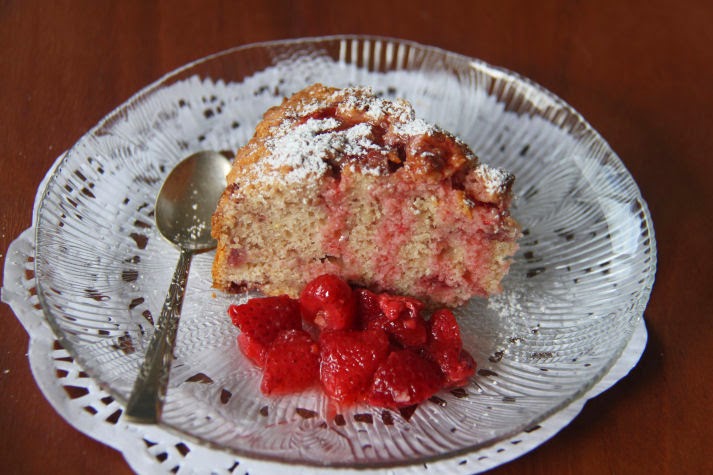
Strawberry Lemon Cake

This was originally a muffin recipe but i prefer it as a cake.


 I don't make a lot of cakes, i prefer to make biscuits, cookies or slices, and as i'm the one who bakes i get to choose.

Sunday, August 24, 2014

Lemon Pudding

Still using lemons in this cloud like, melt in your mouth sweet but also sour lemon pudding. There are lots of pudding recipes out there and i have tried a few. This one is very easy, you can cook it in a large dish or in individual ramekins.


Thursday, August 21, 2014

Rice Pudding

On a cold winters evening a warm bowl of Rice Pudding is very welcome.
I make mine in the slow cooker, its supper easy, pretty much add and forget. The smell of vanilla drifting through the house as the pudding bubbles away in the crock pot makes my mouth water.


Rice Pudding can be eaten warm or cold with or without fruit on top, its very filling so a little goes a long way. However saying that i always make a double lot so there are leftovers for the next day.


Rice Pudding

4 cups Milk
1/2 cup short grain Rice
1/4 cup Sugar
1 tsp Vanilla or 1/2 tsp of Vanilla Paste

Add all to your crock pot and cook on low for 4 or 5 hours and then on high for 1 hour. stirring a few times during cooking. 
You want the rice to be cooked and most of the milk absorbed, cooking times will depend on how big your crock is and if you doubled the recipe.

 If you cook for too long and its very thick and gluggy, turn off the crock and add a little milk and stir until its the consistency you like.
If you reheat it the next day add a little more milk, unless you like it really thick.


This one had a few frozen raspberries on top but you could use any fruit you like or even a bit of jam.
I was thinking of adding sultanas to the crock the next time i make it, i think it would make a good addition.

For the milk you can use fresh, long life, powdered or even almond milk, i pretty much always use long life milk and as i double the recipe its a full 2 litre carton. However when i double the recipe i don't double the sugar.

Anyone else like Rice Pudding, do you make it on the cook top or do you also make it in the slow cooker. 
If you have a different recipe id love to give it a try.

Edited Sunday :
I made it on Thursday and added 1/2 cup sultanas and cut out the sugar. It was very nice, i will make with sultanas again. You could also use raisins or currents as well.

Linked here
 R and R Wednesday # 66
Fabulously Frugal Thursday # 81
Homemaking Party
Tasty Tuesday
Backyard Farming Connection # 94/ 95
Wonderful Wednesday # 87
Tuesdays with a Twist # 72
Maple Hill Hop # 44
 What you Wish Wednesday # 14
Homestead Barn Hop # 172
Homemaking Link Up
Motivation Monday # 109

Monday, August 18, 2014

Lemon Meringue Pie


This is my all time favourite lemon recipe. It was also the first lemon recipe i ever made and that's going back over 25 years. 
The difference between my pie recipe and others is i use a biscuit base instead of a short crust pastry base.
I use Arnotts Marie biscuits and crush them up in my big bench top blender, i usually do two or three packets at a time to fill my jar.


Lemon Meringue Pie

Base
Biscuit Crumbs [enough to line your chosen dish or plate]
Butter melted

Filling
Condensed Milk [can or homemade]
3 Egg Yolks
1/2 cup Lemon Juice
1/2 tsp Vanilla

Meringue Top
3 Egg Whites
1/2 tsp Cream of Tartar
1/8 tsp Salt
2/3 cup Sugar
1 tsp dry Lemon Zest [or zest of 1 lemon]


Base:
Combine the butter with the biscuit crumbs, the amount of butter will depend on the amount of crumbs. Start with a little and add more if you need it. The base should be moist so it can be pressed onto the dish at the bottom and sides. Place in the fridge while you make the filling.

Filling:
Using a wooden spoon mix the milk and juice, add the egg yolks and mix until combined.
Pour into the base and put back in the fridge.

Meringue Top:
Beat whites, salt and cream of tartar until soft peeks . Beat in vanilla and sugar a little at a time until stiff peeks form.
Gently place spoonfuls on top of filling until pie is covered. No need to smooth as its best to leave it rough.
Sprinkle lemon zest on top.
Cook 160 Celsius or 320 Fahrenheit  for 15 minutes or until lightly browned.


I like to make this the day before i need it, as it tastes better the second day. Afternoon tea or a dessert with coffee or a cup of tea, share it or don't its up to you :o)
How do you make your pie ? Do you use a short crust pastry, a puff pastry or a biscuit base.
If you have not made this before and love lemon or lime then please give it a try and let me know how it turned out.

Linked here Happiness is Homemade # 33
and here Simple Saturdays # 36
and here From the Farm Hop
and here Say G'day Saturday # 100
and here Homestead Barn Hop # 172

Thursday, August 14, 2014

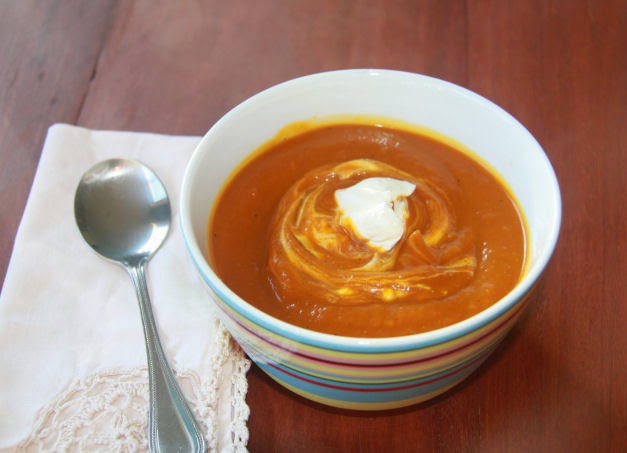
Roast Pumpkin Soup

We have had a couple of cold days so i thought i would make some pumpkin soup. 
This is not my usual pumpkin soup recipe. I dried all my garlic a couple of months ago therefore i didn't have any fresh to roast so thought id try a different recipe, and i have to say i like it a whole lot better than my old Pumpkin Soup recipe.


Pumpkin Soup

Freezes Great
I like to use Jap or butternut pumpkin, you can use a 2kg to 3kg pumpkin anything bigger you will need to double your spice mix.

2kg Pumpkin
2 large Potatoes
2 Carrots
1 Onion

Peel and roast all of the above leave the onion whole and chop up the other veg, drizzle a little olive oil. Cut your potatoes smaller as they take the longest to cook. Roast about 40 mins to an hour 180 Celsius or 360 Fahrenheit. I do mine a little longer because i like it when the pumpkin starts to get black bits around the edges = more flavour.

1/2 tsp Cumin
1/2 tsp Nutmeg
1 tsp Ginger
Salt and Pepper
4 to 6 cups Vegetable Stock
Greek Yoghurt

To a bench top blender add vegetables and stock a little at a time until well blended and smooth.
Pour into a large stock pot and add the spices. Depending on how thick you like your soup you can add more stock or water. I like a thicker soup so it sticks to your bread.
Cook on low for about 15 to 20 minutes.
Serve with a dollop of greek yoghurt or sour cream.
Of course you will also be wanting some Crusty Bread to accompany your delicious soup.

Freezes great, if you use those reseal bags they can be frozen flat and it is heaps quicker to defrost and saves on freezer space.
When reheating from frozen you may want to add a little water.
You can bake the vegetables up to 3 days before you make the soup.
A roast dinner on Sunday add in your extra vegetables and soup on Monday or Tuesday, too easy.

Saturday, August 09, 2014

Natural Pectin

Part 1

I dont buy commercial pectin that is used in jams and jellies. Instead i use lemon seeds.
All citrus seeds are rich in pectin and will thicken any flavour of fruit preserves.
As you may have noticed i use a lot of lemons, they have so much to offer. Juice, peel, pith, flesh and seeds, they can be used in a large variety of sweet and savoury foods.


The seeds can be stored in the freezer for when you need to thicken up your curd, butters or jams. Store them in a small container and just grab as many as needed.

To use the seeds i put them in a small bag that i made out of a piece if net curtain with a draw string and place in your pot or bowl of simmering fruit.


You can also put them into a small piece of cheese cloth and tie with string. I dont like cheesecloth i think it is over rated and way too expensive. A cheep net curtain from a second hand store is a much better option.
When the fruit is done squeeze the bag over the pot, then you can empty and wash for the next use.

If you really want to see pectin at work put several in a small dish with a little water and leave over night, the next day the seeds will have a gel around them. You can use them like this, just drain off the extra water and place in a bag or cloth.

You can also make it from apples and other fruits. The white pith on any under ripe citrus fruit like yellow grapefruit it very high in pectin.
I have not tried making pectin with the pith or any other fruits so when i do ill right up the recipe to share.

Linked here Fabulously Frugal Thursday # 79
and here Say G'day Saturday #99
and here Homemaking party
and here R&R Wednesday # 64
and here From the Farm Blog Hop
and here Old Fashioned Friday # 80
and here Farmgirl Friday # 167
and here Fabulous Finds #18


Wednesday, August 06, 2014

Lemon Melting Moments

These are soft melt in your mouth cookies and very hard to stop at just one. Nice with a hot cup of tea or a cold glass of milk.


 Lemon Melting Moments

225g Butter
50g Icing Sugar
1/2 tsp Vanilla
3 tsp dry Lemon Peel or zest of 4 lemons
225g Plain Flour
3 Tbl Cornflour  [Cornstarch]

Beat butter, sugar, vanilla, and peel until light and fluffy. Sift the flour and cornflour into the butter mix.
Roll into small balls and lightly press with a fork.
You can also pipe these onto the tray, but i find it a pain and too much clean up after.

Cook 175 Celsius or 350 Fahrenheit for about 12 mins, these do not need to be brown.
Let them firm up a bit before placing on a wire rack to cool.


Icing
125g Icing Sugar
1 1/2 tsp dry Lemon Peel or zest of 2 lemons
Lemon Juice

Mix in enough juice to make a soft spreadable icing but not too runny, just add more icing sugar if its too soft. Spread over cold cookies or you can sandwich them with icing in the centre.


I hope your not all sick of lemon recipes yet as i have a few more to come. 
Why so many, you might ask well i do love anything lemon but as there is so much juice, peel and seeds when you process the lemons then you also need recipes to use them up.

If you make these you will not be disappointed, the flavour is delicate yet tart. 


Thursday, July 31, 2014

Lemon Curd


Sunshine in a jar, not too sour and not too sweet. We will be using up some of the lemon juice and freshly dried lemon peel. 


Lemon Curd on a hot fluffy pancake.


All the naked lemons from yesterdays Sunny Lemons post are squeezed. 
Using an old glass juicer makes the job very pleasant and brings to mind memories of when i was a child helping my Nanna in the kitchen. 
Not only do i want juice for this recipe i will also need zest and some of the seeds from the lemons. 
Mmmm seeds your wondering what could they be for, well i dont use commercial pectin to thicken my curd i use the lemon seeds as it already has pectin in the seed. 


Lemon Curd

3 Eggs
1/2 cup Sugar
3/4 cup Lemon Juice
1 teas Lemon Zest dry  [if fresh, zest of one lemon]
150g unsalted Butter

Simmer about 1 inch of water in a small pot. Whisk eggs and sugar in a heat proof bowl and place over your pot. Make sure the bottom of the bowl does not touch the water. I use a small 1L Pyrex bowl.
Stir in the juice, zest and butter. Add about 10 or so seeds to a small bag or piece of cheese cloth and add to your bowl, see picture above.
Make sure your heat is low or it will cook the egg whites. Occasionally stir and cook until it thickens or coats the back of your spoon. It may take a little while but it is well worth it.


While your curd is cooking, boil your jars in a big pot of water for about 10 mins. Turn off the pot and leave them there until your ready to use them. You can put a tea towel in the bottom of the pot so the glass is cushioned if you dont have a jar rack.


When your curd is thickened remove the jars from the pot and drain off any water.
Ladle the curd into your hot jars, i let mine cool before adding the plastic fridge lids.
It will keep for about 3 weeks in the fridge or you can also freeze them.
This makes a really nice lemon tart filling.


This recipe is pretty similar to the Passionfruit Curd i make.
If you give either of them a go let me know how it turns out.


Linked here R&R Wednesday #63
and here Homemaking Party
and here Homemade Monday #91
and here From the Farm Blog Hop
and here Homestead Barn Hop #169
and here Maple Hill Hop #41


Wednesday, July 30, 2014

Sunny Lemons

Today is all about Sunny Lemons, we have a small lemon tree in our vege garden area and it is full of fruit. I love anything lemon especially if its very tart. 


Drying lemon peel and what to do with it.


 First off i scrub the lemons with a small nail brush to remove any dirt. The water in the green tub will be tipped onto the garden when im finished instead of going down the drain.


I use a sharp knife to peel the skin off the lemon, you don't want too much of the pith [the white]. As you can see above most of the pith still remains on the lemon.


If the slices are too long cut or tear them so they sit flat-ish on the dehydrator tray. I ended up with 5 trays of peel from 16 lemons. When using your dehydrator you use the same amount power if you do 1 tray or 10 trays so if you can, fill up the other trays with other items.
This day i added one tray of parsley, one of pac choy and one of bread so all 10 trays are full. Those trays will go on top as they will finish drying quicker than the peel.


As you can see above, i also did two trays of orange peel as well.


Six hours at 55 degrease Celsius and this is the result, crispy hard peel. 


The peel was then put through my Tribest Personal Blender [i will do a review on this another day].


What do you do with all this peel you may ask, well it can be used in biscuits, slices, cakes, pies, ice cream just about anything you might like a lemon flavour to. 
Now i have 16 lemons that need to be juiced, some of the juice will go in recipes and the rest will be put in the freezer for future use.

Stay tuned for lots of lemon recipes.


Linked here Homemade Monday #91
and here Farm Blog Hop
and here Homestead Barn Hop #169
and here Wonderful Wednesday Blog Hop #84
and here Homemaking Party
and here Maple Hill Hop #41
and here Backyard Farming Connection Hop #91
and here Tuesdays With A Twist #69
and here Home- Making Mondays #11
and here Homemaking Party

Tuesday, July 15, 2014

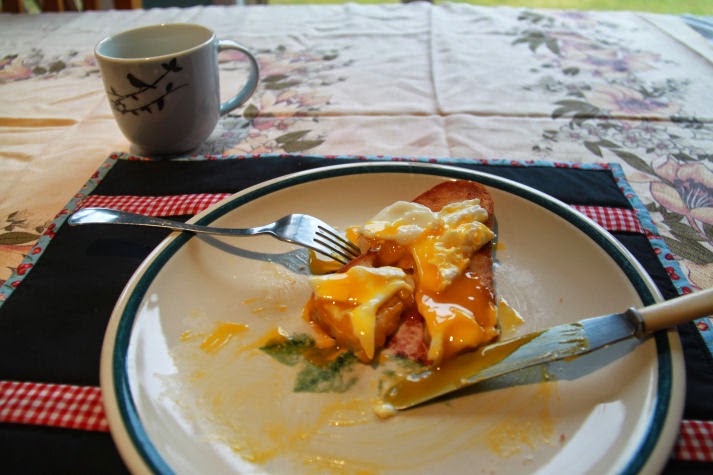
Sunny Poached Eggs


Poached eggs on home made lightly toasted bread with a cup of green tea, that was my breakfast today on this grey morning with the eggs being the only sunny thing. It feels like winter today for the first time, usually my back room is bathed in sunshine but not today. Its a waiting for rain day and that's good because we have not had a good soaking rain in quite a while, so if the 60% chance of rain that they forecast is correct then we should have a good show, well fingers crossed.


Poached Eggs [eggs in a bag]

eggs
salt
vinegar

In a small pot half fill with water and simmer on low heat add a good pinch of salt and about 2 Tbl vinegar.
When its a low simmer [do not boil] crack 1 egg into a small bowl or ramekin, swirl the water in a circle and slide the egg in, keep the swirl going and do the same for the second egg.
Keep them spinning in the pot for about 3 mins.
I never measure or time the cooking of the eggs, after you have made them a few times you will know when they are done.


Why i call them eggs in a bag, well because the sunny yellow yolk is in a bag of white.
If you have not made these before or not for a long time then give them a whirl, you wont be disappointed.
Try to use as fresh an egg as possible as the older they are the more the white separates in the pot. Those two eggs came from my girls this morning.

Linked up at Homestead Barn Hop #167


Saturday, July 12, 2014

Passionfruit Curd


Its like sunshine on a cold winters day, slather it on warm pancakes and while away the morning with a good book or the spring seed catalogue.


Ingredients:

3 Eggs
3/4 cup Sugar
3/4 cup Passionfruit pulp
125g unsalted Butter

Whisk the eggs, sugar and passionfruit in a heatproof bowl over a pot of simmering water [dont let the water touch the bottom of the bowl]
Add the butter and stir, cook until it thickens.

Make sure its a low simmer or you will cook the egg whites [still tastes good but you will have bits of cooked egg white in your curd].
It will take quite a while to thicken, just dont rush it.
Make sure you use unsalted butter or it will have a grainy texture.

Sterilise your jars in a pot of boiling water for 10 mins, i put a tea towel on the bottom of my sterilising pot so my jars are cushioned.

Ladle in the curd while the jars are still hot, let cool and add the lids. I use the plastic screw lids and put them in the fridge.
Keep for about 3 weeks, ours only lasts about a week and a half.

Spread on hot pancakes, toast, fresh bread, scones, use as a filling in a jam roll or any other cake, on ice cream or use it in a trifle. I am sure there are many other yummy dishes you could use it with. Let me know if you have some i haven't listed.


Home Acre Hop #79

Wednesday, July 09, 2014

Tim Tam Cake

Its my husbands Birthday today so i have made him a Tim Tam cake. I saw a picture of one on pinterest so i thought id give it a go.


I used a chocolate fudge cake recipe

250g dark chocolate
125g butter
2/3cup sugar
2/3cup SR Flour
4 eggs

Preheat oven 180 c. butter and line a rectangle baking tray.
Stir chocolate & butter over a pot of simmering water till melted, let cool.
Combine chocolate mix with the remaining ingredients in a medium bowl, beat on low with an electric mixer.
Pour into pan, bake 30 mins. stand 5 mins then turn out onto wire rack to cool.

When cold cut in half and trim up sides making sure they are the same size.

Cake Filling

100g butter softened
150g chocolate [melted and cooled]
3cups icing sugar
1Tbs milk

Beat butter until light and fluffy add sugar and mix until smooth. Add chocolate and enough milk to make a smooth spreadable consistency.
Spread over one cake then place the second cake on top.

Ganache Icing 

100ml pouring cream [i use long life cream]
300g chocolate

Melt chocolate over a pot of low simmering water then add the cream, use a whisk to mix and let thicken slightly. Place on bench to cool for 10 mins then in the fridge for 15 mins siring every 5 mins. You want it to be thick and spreadable but not hard.
Spread over cake and put in fridge to set.
I used a glass to cut out the bite piece.


Saturday, February 15, 2014

Sweet & Sour Chicken


Last nights tea was Sweet & Sour Chicken with Naan Bread


Sweet & Sour Chicken

6 Chicken Thighs
Salt & Pepper
1 cup Flour or Cornflour
1 or 2 Eggs whisked
1 tsp Olive Oil

Chop up your chicken however you like it chunks or strips, in a tupperware container season the flour with salt & pepper. add chicken & shake container to coat.In a bowl whisk your eggs. Heat your fry pan with a little oil. coat your chicken pieces in egg & fry until golden on each side. Place in a baking dish & fry off the rest of the chicken. I like a glass or ceramic baking dish.

Sauce

3/4 cup White Sugar
1/2 cup Tomato Sauce
1/2 cup Apple Cider Vinegar
1Tbs Soy Sauce
1tsp Garlic Salt

Whisk & then pour over the chicken & mix through.
180 degrees C for 30 mins stirring half way.

*You can use Chicken Breast but i prefer thighs because they have a bit of fat on them & it stops them from drying out. Also great served with rice.

Naan Bread


1/4 cup Warm Water
3/4 tsp Yeast
1 Tbl Sugar
4 cups Bread Flour
1 1/2 tsp Baking Powder
1 tsp Baking Soda
3/4 cup Warm Milk
1 cup Greek Yoghurt
Melted Butter for brushing the bread

In a jug dissolve sugar in the water & add the Yeast, set aside for 10 mins.
In a large mixing bowl add flour baking powder & soda, mix.
Add warm milk & yoghurt to yeast & then pour into flour. Mix until dough comes together, it should be a little sticky.
leave in the bowl & cover with a tea-towel let rise for about an hour. when your ready to cook cut into eight pieces & lightly roll flat. the shape does not matter. melt some butter & brush one side of each bread. heat the fry pan to very hot. add any seasoning to the top of breads. place bread top side down in fry pan & brush the other side with butter. cook for one to two mins & flip.

*You can use any type of season you like, we use:
Mixed Herds
Garlic Salt
Parmesan Cheese
or just plain

* This is the best sweet & sour chicken i have ever tasted & its in my fortnightly meal plan rotation.
let me know if you give it a try & what you think of it.


Sunday, January 15, 2012

Tree to Table


theses green beauties came from one of our plum trees down in the chook yard. thought we would give ripening them inside a go as the birds are very greedy & don't like to leave us any.


wiped them all with a damp Flannel cloth & then placed them into paper bags to ripen. about 3 weeks later they were nice & ripe, ready to eat. after 2 weeks check them every day until they are ready.


Plum Upside Down Cake


50g Butter
1/3 cup Brown Sugar
125g Butter
1 cup Sugar
1 tsp Vanilla
2 Eggs
1/2 cup Almond meal
1 1/2 cups SR Flour
Plums [i used about 13 or 14 it will depend on the size of your pan]

Grease your pan & line with paper on the bottom [no need to do the sides]
Melt the 50g of Butter & pour over the lined bottom
Sprinkle the Brown Sugar over the melted butter set aside

Beat 125g Butter, Sugar & Vanilla until pale & creamy [or not so pale if you have fresh free range eggs]
Add Eggs & beat well
Fold in the Flour & Almond meal

Halve your plums & remove the seed, place skin side down on top of the brown sugar until the bottom is covered
Spoon mixture over the Plums & smooth with the back of your spoon
Bake 40 to 45 mins
Stand cake in tin for 10 mins before turning out
The paper should be left in the bottom of the pan when the cake comes out
Serve hot or cold with Cream or Ice Cream or on its own with a dusting of Icing Sugar


Green Shake Combos all with spinach

Banana & Strawberry
Banana & Rockmelon
Banana & Pineapple
Raspberry & Strawberry
Banana &; Blueberry
Orange & Pineapple


Tiramisu 


1cup Sugar
4 Egg Yolks
1 1/2 tsp Vanilla
1pk Cream Cheese
1 3/4 cups Cream
1 Tbl Coffee
1 1/4 cups hot water
1 pk Lady Finger Biscuits
1 cup Dark Chocolate chopped

Beat Sugar, Egg Yolks & Vanilla for about 1 min.
Add Cheese & mix until smooth.
Place in the fridge for about 1 hour

Whip your cream & then fold into your Cream Cheese
Place back into the fridge for 1 hour
Add Coffee to the Hot Water & leave to cool in a bowl

Dip Lady Fingers into the coffee one at a time [don't leave in the coffee or they will fall apart]
Place a row of fingers in the bottom of your chosen dish
Sprinkle Chocolate over the fingers then spoon a layer of Cheese mix over that
Continue until your are left with the Cheese mix at the top of the bowl add the last of the Chocolate
Place back into the fridge until needed
Best made one or two days before served

i usually make this in a glass trifle bowl but we were taking it to a BBQ so i made it in a glass dish with a lid, much easier for travelling.

This time with the left over Egg Whites i made single serve mini Pavlova's

Sunday, January 08, 2012

Green Breakfast

im trying something new this year to get healthy & stay healthy.
they say you should eat green vegetables for breakfast well im not too keen on having steamed broccoli for breakfast so my solution to a green breakfast is this beautiful green shake.

Green Shake


1 frozen Banana [or fresh]
4 Strawberries
2 handfuls of spinach
1 1/2 cups water
blend until smooth, if its too thick for you add a bit more water.
it tastes great :o)


and to go with my green shake 2 organic eggs from my chooks lightly scrambled [nothing added] seasoned with pepper & celtic sea salt. you could also add parsley or chives but i didnt want to go down the back in the rain again to pick some.

this is not a diet, its a life style

it was a very big drink so i didnt have my organic green tea until about 1/2 an hour later.

Pavlova


Pavlova

4 Egg Whites {left over from the custard]
1tsp Vanilla
1/4 tsp Cream of Tartar
1/3 cup sugar

Beat eggs, vanilla & cream of tartar until soft peeks form.
slowly add in sugar, beat until stiff peaks form.

line a tray with either baking paper or brown paper, use a small dab of mix to each corner so the paper stays flat while cooking.
spoon mix onto your tray in any form you like, above it did 2 rectangles.
oven 150 Celsius [300F] for 30 minutes
turn off the oven & leave in there for a few hours [door closed]
when i make these i make them late in the afternoon & leave them in the oven over night.
i usually make two or three because i like to layer them with cream in between.
i did not have any fresh fruit so i used fruit that i froze last year.
Passionfruit, Strawberries & Raspberries
defrosted before adding to the pav, you get lots of runny juice its very delicious

Saturday, January 07, 2012

Pie & Custard

a handful of this


plus a few of these


makes this


Rhubarb from the garden & few green apples from the tree makes a wonderful Apple & Rhubarb Pie with some home made Custard.
i stewed the Apples & Rhubarb separate, then mixed them together & poured it into the pie crust.

Home-made Custard


  • 1 cup milk
  • 1 cup thickened cream
  • 1 vanilla bean or 1tsp Vanilla 
  • 4 egg yolks
  • 1 tablespoon cornflour
  • 1/3 cup caster sugar

  • Combine milk and cream in a small pot & add vanilla [if using vanilla bean split bean lengthways & scrape seeds into milk & drop in the bean] 

  • Cook slowly on medium heat until hot but not boiling.

  • Whisk egg yolks, cornflour and sugar in a glass bowl.

  • Remove vanilla beans from milk mixture. 

  • Pour hot milk mixture over egg yolk mixture & whisk 

  • Pour into a medium pot & cook on low, stirring constantly for about 10 mins or until thick & will coat the back of a spoon. 
  • Do not allow custard to boil, as it might curdle.

i hate it when you have a recipe that calls for either just the whites or just the yolks. when this happens i always have a companion recipe to use the left over egg. in this case it is Meringue/ Pavlova. i will post that recipe tomorrow.