Sunday, January 15, 2012

Tree to Table


theses green beauties came from one of our plum trees down in the chook yard. thought we would give ripening them inside a go as the birds are very greedy & don't like to leave us any.


wiped them all with a damp Flannel cloth & then placed them into paper bags to ripen. about 3 weeks later they were nice & ripe, ready to eat. after 2 weeks check them every day until they are ready.


Plum Upside Down Cake


50g Butter
1/3 cup Brown Sugar
125g Butter
1 cup Sugar
1 tsp Vanilla
2 Eggs
1/2 cup Almond meal
1 1/2 cups SR Flour
Plums [i used about 13 or 14 it will depend on the size of your pan]

Grease your pan & line with paper on the bottom [no need to do the sides]
Melt the 50g of Butter & pour over the lined bottom
Sprinkle the Brown Sugar over the melted butter set aside

Beat 125g Butter, Sugar & Vanilla until pale & creamy [or not so pale if you have fresh free range eggs]
Add Eggs & beat well
Fold in the Flour & Almond meal

Halve your plums & remove the seed, place skin side down on top of the brown sugar until the bottom is covered
Spoon mixture over the Plums & smooth with the back of your spoon
Bake 40 to 45 mins
Stand cake in tin for 10 mins before turning out
The paper should be left in the bottom of the pan when the cake comes out
Serve hot or cold with Cream or Ice Cream or on its own with a dusting of Icing Sugar


Green Shake Combos all with spinach

Banana & Strawberry
Banana & Rockmelon
Banana & Pineapple
Raspberry & Strawberry
Banana &; Blueberry
Orange & Pineapple


Tiramisu 


1cup Sugar
4 Egg Yolks
1 1/2 tsp Vanilla
1pk Cream Cheese
1 3/4 cups Cream
1 Tbl Coffee
1 1/4 cups hot water
1 pk Lady Finger Biscuits
1 cup Dark Chocolate chopped

Beat Sugar, Egg Yolks & Vanilla for about 1 min.
Add Cheese & mix until smooth.
Place in the fridge for about 1 hour

Whip your cream & then fold into your Cream Cheese
Place back into the fridge for 1 hour
Add Coffee to the Hot Water & leave to cool in a bowl

Dip Lady Fingers into the coffee one at a time [don't leave in the coffee or they will fall apart]
Place a row of fingers in the bottom of your chosen dish
Sprinkle Chocolate over the fingers then spoon a layer of Cheese mix over that
Continue until your are left with the Cheese mix at the top of the bowl add the last of the Chocolate
Place back into the fridge until needed
Best made one or two days before served

i usually make this in a glass trifle bowl but we were taking it to a BBQ so i made it in a glass dish with a lid, much easier for travelling.

This time with the left over Egg Whites i made single serve mini Pavlova's

Sunday, January 08, 2012

Green Breakfast

im trying something new this year to get healthy & stay healthy.
they say you should eat green vegetables for breakfast well im not too keen on having steamed broccoli for breakfast so my solution to a green breakfast is this beautiful green shake.

Green Shake


1 frozen Banana [or fresh]
4 Strawberries
2 handfuls of spinach
1 1/2 cups water
blend until smooth, if its too thick for you add a bit more water.
it tastes great :o)


and to go with my green shake 2 organic eggs from my chooks lightly scrambled [nothing added] seasoned with pepper & celtic sea salt. you could also add parsley or chives but i didnt want to go down the back in the rain again to pick some.

this is not a diet, its a life style

it was a very big drink so i didnt have my organic green tea until about 1/2 an hour later.

Pavlova


Pavlova

4 Egg Whites {left over from the custard]
1tsp Vanilla
1/4 tsp Cream of Tartar
1/3 cup sugar

Beat eggs, vanilla & cream of tartar until soft peeks form.
slowly add in sugar, beat until stiff peaks form.

line a tray with either baking paper or brown paper, use a small dab of mix to each corner so the paper stays flat while cooking.
spoon mix onto your tray in any form you like, above it did 2 rectangles.
oven 150 Celsius [300F] for 30 minutes
turn off the oven & leave in there for a few hours [door closed]
when i make these i make them late in the afternoon & leave them in the oven over night.
i usually make two or three because i like to layer them with cream in between.
i did not have any fresh fruit so i used fruit that i froze last year.
Passionfruit, Strawberries & Raspberries
defrosted before adding to the pav, you get lots of runny juice its very delicious

Saturday, January 07, 2012

Pie & Custard

a handful of this


plus a few of these


makes this


Rhubarb from the garden & few green apples from the tree makes a wonderful Apple & Rhubarb Pie with some home made Custard.
i stewed the Apples & Rhubarb separate, then mixed them together & poured it into the pie crust.

Home-made Custard


  • 1 cup milk
  • 1 cup thickened cream
  • 1 vanilla bean or 1tsp Vanilla 
  • 4 egg yolks
  • 1 tablespoon cornflour
  • 1/3 cup caster sugar

  • Combine milk and cream in a small pot & add vanilla [if using vanilla bean split bean lengthways & scrape seeds into milk & drop in the bean] 

  • Cook slowly on medium heat until hot but not boiling.

  • Whisk egg yolks, cornflour and sugar in a glass bowl.

  • Remove vanilla beans from milk mixture. 

  • Pour hot milk mixture over egg yolk mixture & whisk 

  • Pour into a medium pot & cook on low, stirring constantly for about 10 mins or until thick & will coat the back of a spoon. 
  • Do not allow custard to boil, as it might curdle.

i hate it when you have a recipe that calls for either just the whites or just the yolks. when this happens i always have a companion recipe to use the left over egg. in this case it is Meringue/ Pavlova. i will post that recipe tomorrow. 

Friday, January 06, 2012

Fruit & Visitors

we have four orange trees, the oranges here are from the orange tree at the top of the orchid, they have thin skin that is easy to peel & oh so sweet. lots of tiny seeds but you don't really notice them when you eat them. the colour is not a trick of the camera they really are this dark orange colour, i have never seen a bought orange this colour [not including blood oranges].


for anyone who does not know what this is, its a Blue Tongue Lizard.


when frightened they hiss & puff themselves up big to scare off who ever comes near.
we have 3 of these, two that live down the side & the other one lives out the front.


Miss Sally Girl does not like them in her yard & will bark at them until they go where she cant see them.
the only reason she is lying down here is because i told her too, but as soon as i go inside she will be at the barking again.


we have tried putting them over the fence next door but they just climb back over again. this one is the small one the other is quite a bit bigger. when Sally Girl fist found it we didnt know what it was at first cause it was in the bushes & when it kind of jumped up & out i first thought it was a snake but thank goodness it wasn't or it would have bitten my Sally Girl. snakes are the only thing i am frightened of & im always on the look out. for anyone who does not live in Australia we have the most poisonous snakes in the word oh & spiders.

Wednesday, January 04, 2012

Garden Notes

Start to finish pictorial of our veggie garden
6.6 x 10.8 metres = [ 71.28 sqm ]


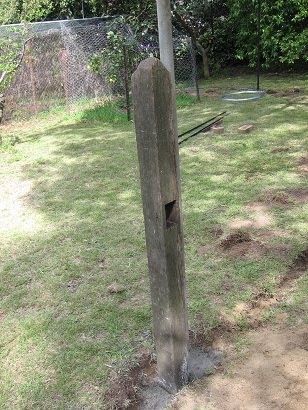
the 2 corner posts


chicken wire


the gate


concreting the wire


the gate post


sandstone entry


beds & mulch


netting on the top


finally finished

steel posts = 0
star pickets = 0
chicken wire = 0
gate = 0
timber gate post = 0
fencing wire = $40
fencing clips = $6.95
bird netting = $75.88
concrete = $50
wire tension =  $23.60

total = $ 196.43

Monday, January 02, 2012

Garden Notes

2011 is gone & 2012 is upon us who new the year would go so darn fast.
on the last day of 2011 we spent it down the back in the veggie garden.


all spring/ summer we have been plagued with butterflies & some may say how lovely, but it has not been lovely. when ever anything new has emerged from the ground they have been eaten to within an inch of their lives. we made a hoop net over 3 of the garden beds as a quick solution & it worked great but it didnt solve the problem for the rest of the garden. money has been really tight with me still out of work & A is on holidays for two more weeks, so we have been working on how to solve the problem without spending a lot of money. a while ago we purchased 2 bird net rolls for $16 each, we have managed to cover most of the roof area, we were a metre shot on one length. in just two days it has made quite a difference with lots of butterflies flying about above the netting.


for christmas A & i received a few hardware gift cards so today we will be off down the mountain to purchase two more bird nets to hopefully finish off this afternoon.


Wednesday, December 21, 2011

Christmas Sweets

Peppermint Patties

Servings 48
1 can Condensed Milk
3/4 tsp Peppermint Oil or [1 Tbl Extract]
6 cups Icing Sugar Sifted 
Dark Chocolate Melts

Cover 2 large cooking trays with baking paper & dust with icing sugar, set aside.
In a large bowl mix the milk & peppermint with a wooden spoon [do not use metal]
Mix in 1 cup at a time of icing sugar, by the time you get to 4 cups you will no longer be able to use the spoon, so put on some food grade gloves & mix the rest by hand. you may need more sugar just keep adding it till you get a stuff consistency & is no longer sticky. 
Now roll into 1/2 walnut size balls & place on your trays. Roll a few, then flatten with the bottom of a glass that has been dipped in icing sugar.
Do not do too many before flattening as they start to dry out & will crack too much. Now cover with a fly net & leave to dry for about 6 hours then turn them over & leave over night. Using a pastry brush, brush off the icing sugar & set them aside. They will keep like this in a container for a few days. Melt chocolate over a double boiler. Cover your trays with foil. Dip each patty in chocolate & pick up using a fork & tap off excess chocolate. I use a skewer to slide the patty onto the foil tray to harden.
These are a very strong peppermint flavour when you use the oil. 
I also made a second lot using Orange Extract, they taste like Jaffas.
Once hardened package as you like & store in the cupboard. They will last a good few weeks if you can resist eating them all.


Dried over night & ready to coat


Dipped in dark chocolate


Wrapped in small pieces of foil

All ready to give

If anyone makes these id love to hear about it :o)

Thursday, December 15, 2011

Wine Barrel Lights

we are having an 18th Birthday Party here on saturday for son #2, i have been busy cooking all week & took a break yesterday to make some lights. i have seen similar ones made from ladders, wagon wheels & even bicycle rims. i have used 3 steel bands from an old 1/2 wine barrel that rotted away.


here is a quick tutorial of how i made them


steel bands & also not pictured 2 lengths of rusty chain


wire, pliers, fencing clips

make a loop & twist then wrap around your chosen object, take the wire across to the other side, wrap & make another loop, wrap again & cut the wire.
now do the same again so you now have a cross. those loops will be attached to the chain to hang your lights.


now turn the whole thing upside down so the loops are facing the ground. do two more the same as the first two so it looks like the spokes of a wheel. i used a fencing clip to bring all the wires to the centre [above picture]


you can add extra loops in the gap of each spoke so you can add more lights.


i used fencing clips to attach the chain to the top loops.

large coffee jars, jam & honey jars. there is a tutorial for wiring those here i used around about the same method. tea lights in the bottom & a long handled lighter.
i made two, the other one will have to wait till i get a few more jars if i want to have three hanging chandelier lights.

Friday, December 09, 2011

Potato Casserole & Honey Mustard Sausages

Because im home, i have heaps of time on my hands so i have been trying out new recipes that i have found on Pinterest. This is the potato casserole i made last night with a couple of changes from the original recipe.


original recipe comes from  MakeLifeDelicious Below is my version

Potato Casserole

1 1/2 kg Potatoes
2 cans Cream of Mushroom Soup
300ml Sour Cream
1 1/2 cups grated Cheese
Salt & Pepper
sprinkling of Bread Crumbs
few knobs of Butter


place a clean tea towel inside a large mixing bowl or bucket


peal your potatoes


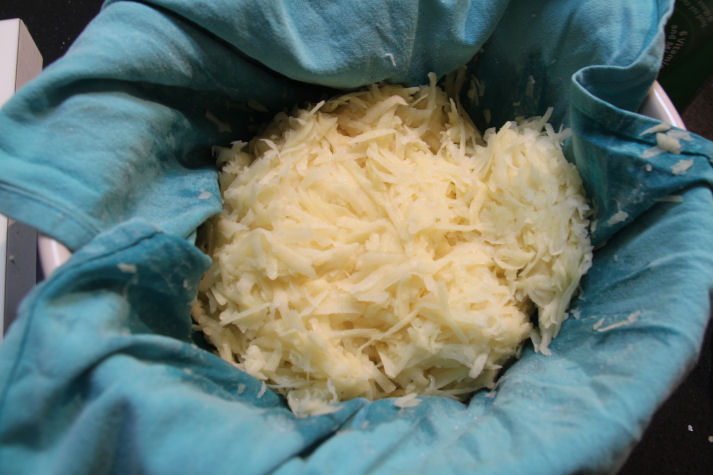
grate your potatoes into your tea towel, then bring up the corners of your tea towel, twist & then squeeze your potato ball to remove excess water. empty your bowl with the potato juice & wipe out.


place into your bowl : Potato, Soup, Cream, Cheese, Salt & Pepper, mix together.
grease your baking tin ~ casserole dish i have found butter works better than oil.


tip in your mix, add a few knobs of better & sprinkle with bread crumbs.
180 degrees on the middle shelf for about 1 hour or until brown & bubbly.
this makes a fair bit but its even better reheated the next day.
you can add extra chopped mushrooms
i dont always have sour cream so i just use a carton of long life cream from my pantry


Honey Mustard Sausages

this recipe calls for those little cocktail sausages but i just use regular thin sausages the other ones are too expensive. this recipe has no quantities

Sausages
Honey
Wholegrain Mustard

cook your sausages either in a fry pan or i usually cook them in a baking tray in the oven. remove the sausages & drain, cut each sausage into three pieces.
in a small pot add about 2 1/2 Tbl Honey & 2 Tbl Mustard [the amount will depend on how many sausages you use] heat until runny.
there are two ways to do this, you can either put the sausages back into the pan [after you have drained the fat & wiped out the pan] & then pour over the honey mix & place it back into the oven for five minutes or you can put the sausages into a serving bowl & honey mix into a dipping bowl {second option is good for party finger food]

both recipes are very yummy, especially the next day :o)

i still have some stuff over on my Flickr account for sale if you want to have a look :o)